How to Split Screen on Windows – Easy Tips for Beginners
Published: 27 Jan 2026
Did you know that Windows users can easily boost productivity by using the split screen feature? How to Split Screen on Windows allows you to view two apps side by side, making multitasking faster and smoother. This feature is especially useful for students, professionals, and anyone who works with multiple windows at the same time.
What Is Split Screen and Why Use It
Split screen on Windows is a feature that allows users to view two or more windows at the same time on one screen. Instead of switching back and forth between apps, they are displayed side by side. This feature uses Snap Assist and Snap layouts, making multitasking easy and fast.
Here are some key advantages of using split screens:
- Work Faster: Use two apps at the same time.
- Stay Focused: See important windows clearly.
- Compare Easily: Check two files side by side.
- Smooth Workflow: Arrange windows neatly.
- Do More Tasks: Watch and work at once.
- Save Time: No switching back and forth.
- Learn Quickly: Follow and practice together.
- Keep Desktop Clean: Reduce clutter on your screen.
Split screen is helpful for everyone students, professionals, and anyone who wants to improve productivity on Windows. With Snap Assist and Snap layouts, arranging windows is simple and takes just a few clicks. It is one of the most useful tools for Windows multitasking.
1. How to Split Screen on Windows 7
Windows 7 has a simple Snap feature to split your screen between two windows. It is simple and helps with multitasking. Here is a complete method explaining how to split the screen on Windows 7 for beginners.
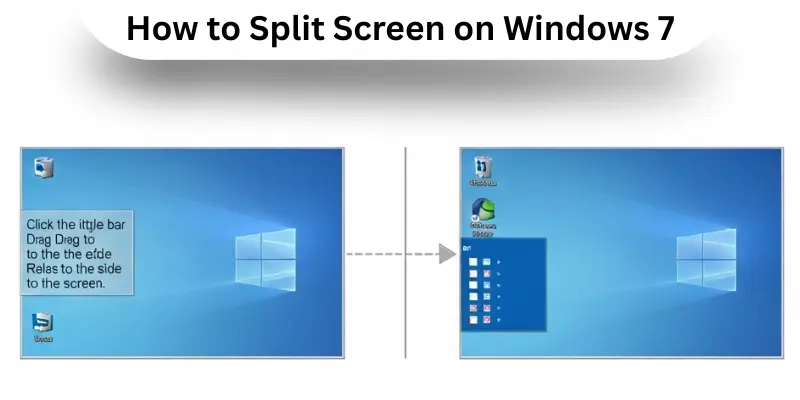
- Method 1: Snap Windows Using Mouse
- Click the title bar of a window.
- Drag it to the left or right edge of the screen.
- Release to snap it to that side.
- Snap another window to the opposite side.
- Method 2: Snap Windows Using Keyboard
- Select a window and press Win + Left Arrow or Win + Right Arrow.
- Use Win + Up Arrow to maximize or Win + Down Arrow to minimize.
- Method 3: Resize Windows
- Drag the divider line between two windows to adjust size.
- Method 4: Switch Between Windows
- Use Alt + Tab to move between snapped windows quickly.
2. How to Split Screen on Windows 8
Windows 8 allows you to use a feature called Snap to split your screen between two apps. Here is a complete method explaining how to split the screen on Windows 8 for beginners.
- Method 1: Enable Snap Feature
- Open Control Panel > Ease of Access > Make the computer easier to see.
- Ensure Snap is enabled to allow side-by-side windows.
- Method 2: Drag and Snap Windows
- Click the window’s title bar and drag it to the left or right edge.
- Release to snap the window.
- Snap another window on the opposite side.
- Method 3: Use Keyboard Shortcuts
- Press Windows Key + Left Arrow to snap left.
- Press Windows Key + Right Arrow to snap right.
- Press Windows Key + Up Arrow to maximize, Down Arrow to minimize.
- Method 4: Switch Between Snapped Windows
- Use Alt + Tab to move between open windows quickly.
3. How to Split Screen on Windows 10
Windows 10 includes a feature called “Snap Assist”. It helps you easily split your screen by suggesting available windows to snap alongside the one you’re using. Here is a complete method explaining how to split the screen on Windows 10 for beginners.
- Method 1: Drag and Snap
- Click the window’s title bar and drag it to the left or right edge.
- Release to snap it to that half of the screen.
- Snap another window on the opposite side.
- Method 2: Keyboard Shortcuts
- Select a window and press Win + Left Arrow or Win + Right Arrow.
- Use Win + Up/Down Arrow to maximize or minimize.
- Switch between windows using arrow keys.
- Method 3: Snap Assist Menu
- Click the maximize button on a window.
- Pick a quadrant layout to snap the window.
- Method 4: Windows Key + Arrow
- Win + Left/Right Arrow: Snap window to left or right.
- Win + Up Arrow: Maximize window.
- Win + Down Arrow: Minimize or restore window.
- Method 5: Resize Snapped Windows
- Drag the line between two windows to adjust size.
- Method 6: Switch Between Windows
- Use Alt + Tab or Win + Tab to move quickly.
- Method 7: Use Snap Layouts (Windows 11 only)
- Hover over the maximize button to choose layouts.
- Arrange two, three, or four windows in a grid.
4. How to Split Screen on Windows 11
Windows 11 brings “Snap Layouts”, giving you more options to organize multiple windows in different layouts for flexible multitasking. Here is a complete method explaining how to split the screen on Windows 11 for beginners.

- Method 1: Snap Layouts Menu
- Hover over the maximize button of any window.
- Pick a layout from the menu.
- Select other windows to fill the remaining spaces.
- Method 2: Keyboard Shortcuts
- Press Win + Z to open Snap Layouts.
- Use arrow keys to choose a layout and press Enter.
- Snap other windows into the remaining spaces.
- Method 3: Drag and Drop
- Click and hold the window’s title bar.
- Drag it to the top of the screen to show Snap Layouts.
- Move it to the desired position and release to snap.
- Method 4: Resize Snapped Windows
- Drag the line between windows to adjust sizes.
- Method 5: Switch Between Windows
- Use Alt + Tab or Win + Tab to move between apps quickly.
Advanced Split Screen Techniques
Once you are familiar with the basic split screen on Windows, there are many advanced techniques that can make multitasking even easier. Here is a complete explanation of advanced split screen techniques for beginners.
1. Quad Split
Snap four windows into one screen by using the corners. For example, you can place a browser in the top left, a document in the top right, a video in the bottom left, and notes in the bottom right. This is great for users who need to monitor or work on multiple apps at once.
2. Custom Layouts
Windows 11 allows you to create your own window arrangements. You can save these layouts and use them whenever needed, so your favorite apps always open in the perfect positions.
3. Virtual Desktops
Virtual desktops let you create separate workspaces on your PC. You can have one desktop for work, another for study, and a third for entertainment. Switch between them easily using Win + Tab or Ctrl + Win + Left/Right Arrow.
4. Resizing Snapped Windows
After snapping windows, you can adjust their size by dragging the dividing line. This technique is helpful when you want one app to be larger and another smaller.
5. Combining Snap with Multiple Monitors
If you have more than one monitor, you can snap windows on each screen. This expands your workspace and allows you to work on more apps at the same time without clutter.
6. Snap Groups
Windows 11 remembers groups of snapped windows called Snap Groups. You can open all apps in a group together with a single click from the taskbar.
7. Keyboard Shortcuts for Advanced Snapping
Use Win + Arrow keys for quick snapping to sides or corners. Combine with Shift + Win + Arrow to move snapped windows between monitors.
8. Using Apps Side by Side Without Maximizing
Some users prefer keeping windows slightly smaller and side by side without snapping fully. Dragging them manually while holding Win helps keep them organized without using Snap Assist.
Keyboard Shortcuts for Split Screen
Keyboard shortcuts make split screen on Windows faster and easier. By pressing a few keys, users can quickly move, resize, and organize windows on the screen. This method saves time and improves daily work speed. Here are commonly used shortcut keys for beginners.
- Win + Left Arrow: Snaps the active window to the left side of the screen.
- Win + Right Arrow: Snaps the active window to the right side of the screen.
- Win + Up Arrow: Maximizes the window or moves it to the top corner when already snapped.
- Win + Down Arrow: Minimizes the window or moves it to the bottom corner.
- Win + Left + Up Arrow: Moves the window to the top-left corner of the screen.
- Win + Left + Down Arrow: Moves the window to the bottom-left corner.
- Win + Right + Up Arrow: Moves the window to the top-right corner.
- Win + Right + Down Arrow: Moves the window to the bottom-right corner.
- Win + Tab: Opens Task View to switch between windows and virtual desktops.
- Ctrl + Win + Left / Right Arrow: Switches between virtual desktops.
- Shift + Win + Left / Right Arrow: Moves the active window to another monitor.
Split Screen Tips & Tricks
Split screen makes work faster on Windows. Simple tips help users manage windows easily and stay focused. Below are explained split screen tips for beginners.
- Use keyboard shortcuts to save time.
- Try corner snapping for four windows.
- Resize windows by dragging the divider.
- Pick the right snap layout for tasks.
- Keep related apps side by side.
- Use virtual desktops for better order.
- Combine split screen with multiple monitors.
Troubleshooting Split Screen Issues
Sometimes split screen does not work as expected on Windows. These problems can confuse beginners. Below, common split screen issues are explained with simple fixes so new users can solve them easily.
Common Split Screen Problems and Fixes
- Windows does not snap windows: Check that Snap is turned on. Go to Settings > System > Multitasking and enable Snap windows.
- Snap layouts do not show: Make sure the system is running the latest version of Windows 11. Older versions may not support Snap layouts.
- Computer feels slow during split screen: Close unused apps running in the background. This step frees system resources and improves performance.
- Split screen works differently each time: Update display drivers from Device Manager. Updated drivers improve screen compatibility.
- Windows snap to wrong sizes: Check display scaling settings in Windows Settings. Incorrect scaling can affect window size.
- Some apps refuse to split: Certain apps do not support split screens. Try using a different app or update the current one.
Optimizing Your System for Split Screen Multitasking
Split screen multitasking works best when the system runs smoothly. Small system improvements can make a big difference. Below, all optimizing steps are explained in an easy way so beginners can follow them without confusion.
- Keep Windows updated: Regular updates add new features and fix bugs. This helps split screen work better.
- Add more RAM: Extra memory helps the system handle multiple apps at the same time.
- Use an SSD drive: SSDs load apps faster than old hard drives. Faster loading supports smooth multitasking.
- Keep the desktop clean: Fewer icons reduce load on the system. A clean desktop improves performance.
- Use built-in cleanup tools: Disk Cleanup and Defragment tools remove junk files. This keeps the system fast.
- Close unused background apps: Closing unused apps frees system resources and improves split screen performance.
- Adjust visual effects: Reducing animations helps slower systems run smoother during multitasking.
Split Screen for Specific Use Cases
Split screen is useful for many daily tasks on Windows. It helps users handle more than one activity at the same time. Below, split screen uses are explained with clear examples so beginners can understand them easily.
- learning: Students can watch lessons on one side and take notes on the other.
- Office: Documents and emails can stay open together for faster work.
- Online research: Users can read information and write content at the same time.
- Video meetings: Video calls can run on one side while notes stay open on the other.
- Comparing files: Two documents or images can be checked side by side.
- Content creation: Writing tools and reference material can stay open together.
- Entertainment: Videos can play on one side while browsing on the other.
Advantages and Disadvantages of Split Screen on Windows
Split screen on Windows helps users manage more tasks at one time. It saves time and improves focus. However, this feature also has some limits. Below, the advantages and disadvantages are explained in a simple way for beginners.
| Advantages of Split Screen on Windows |
|---|
|
| Disadvantages of Split Screen on Windows |
|---|
|
Conclusion
Split screen on Windows is a simple but powerful feature for multitasking. It helps users view two or more windows at the same time, compare documents, follow tutorials, and improve productivity. Using Snap Assist, Snap layouts, keyboard shortcuts, and advanced techniques makes multitasking smoother and faster. By practicing these methods, anyone can make Windows work more efficiently and save time.
FAQs About Split Screen on Windows
Open the first app and drag it to the left or right edge, or use Win + Left/Right Arrow to snap it. Then open the second app and snap it to the other side.
Yes, Windows 11 allows quad split and Snap layouts to place up to four windows on one screen.
Check that Snap is enabled in Settings > System > Multitasking. Also, some apps do not support split screen.
Use Shift + Win + Left/Right Arrow to move a snapped window to another monitor.
Drag the divider between two snapped windows to adjust their size.
Use keyboard shortcuts, keep your desktop clean, close unused apps, and consider using virtual desktops or multiple monitors.